


How to Setup Nomba Checkout on shopify
Simple Setup Process for Nomba Checkout on Your Shopify Website


Introduction
Nomba provides a Shopify checkout plugin to accept payment in your online store. This plugin is similar to the WordPress plugin simply because they are both used for accepting online payments. Also, it belongs to the no-code ecosystem. When building a Shopify store, there are different ways to accept payment.
Typically, payment is a third-party thing for Shopify, but then they support some providers by default. This process is slightly different when you want to use Nomba as a payment provider in your Shopify store.
This Plugin is available to Nigerian merchants and it can be used to process internatio nal and local Payments.
To use Nomba as your Shopify store payment provider, you will need to create an account on the Nomba Website > go to the settings page on your dashboard. Click on Get API Keys. The process is straightforward.
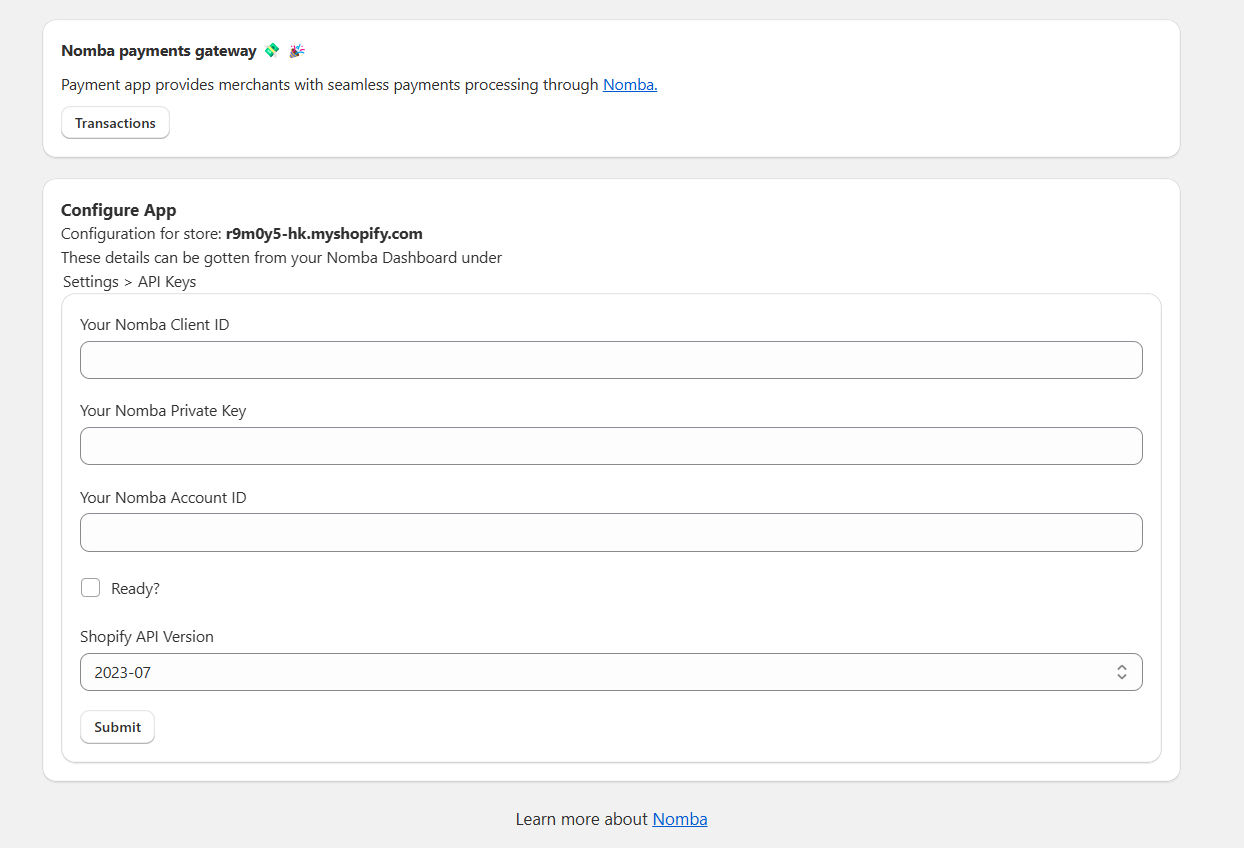
These are the 3 things to get on the settings page before adding Nomba as a payment provider on your store. We provide the option to switch between live and test keys.
- ClientID
- Private Key
- Account ID
Step-by-step installation guide
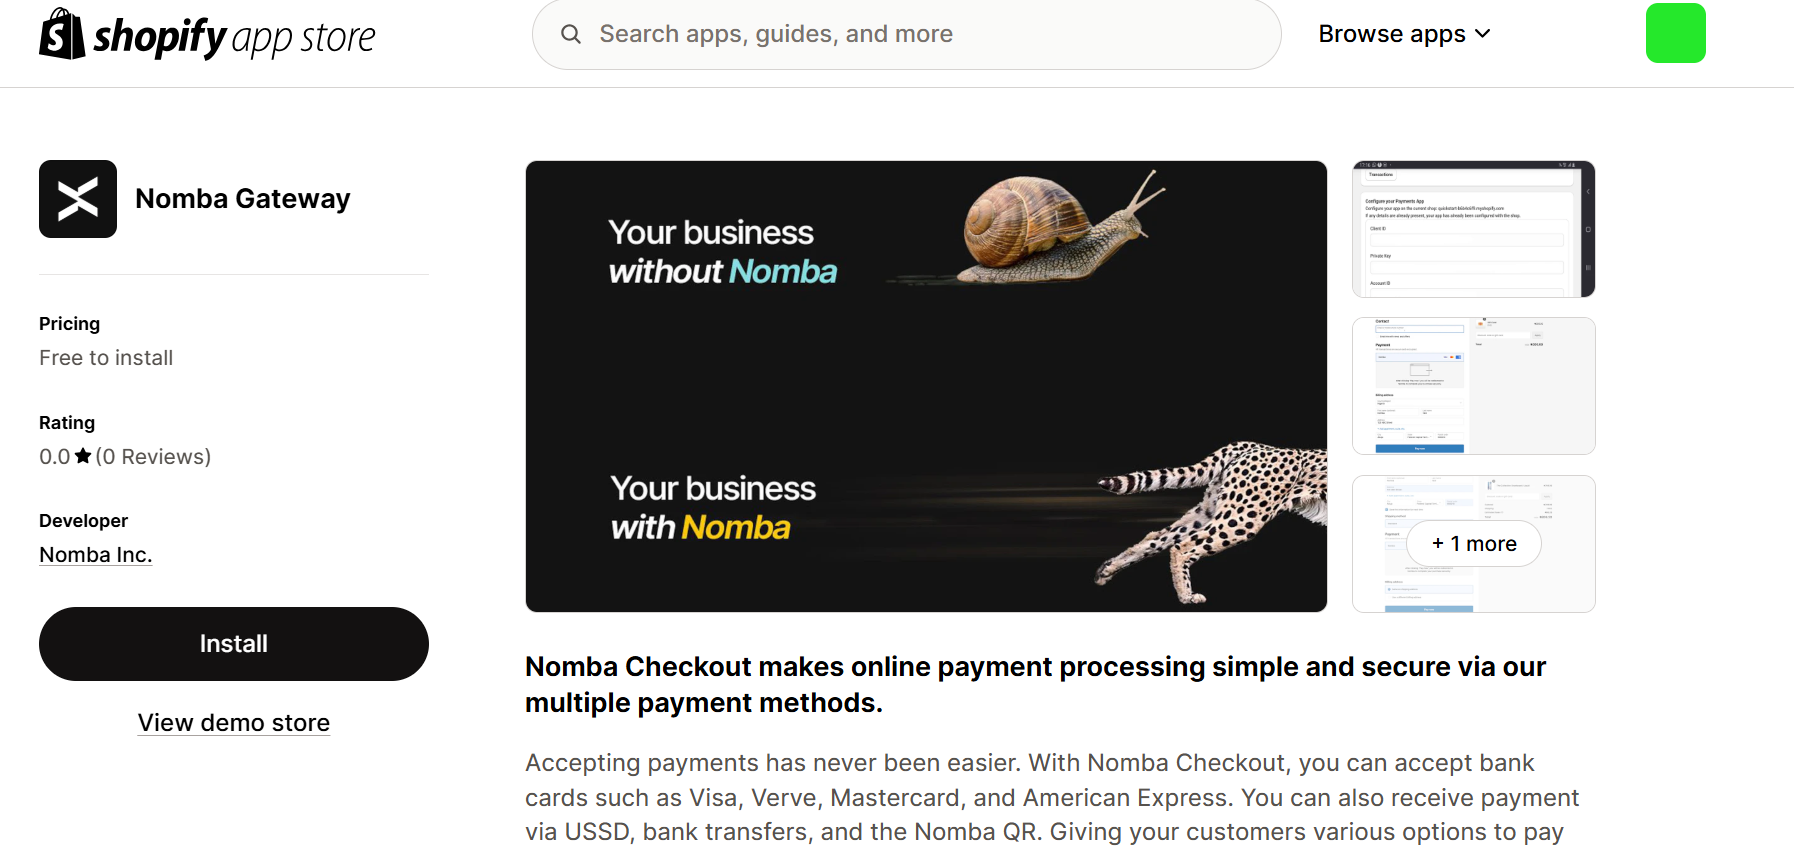
The step requires that you add Nomba as a third-party app. Look at Nomba Shopify plugin here and click on Install
 When you click on Install, you will be redirected to your Shopify admin page, where you can now properly install the Nomba app.
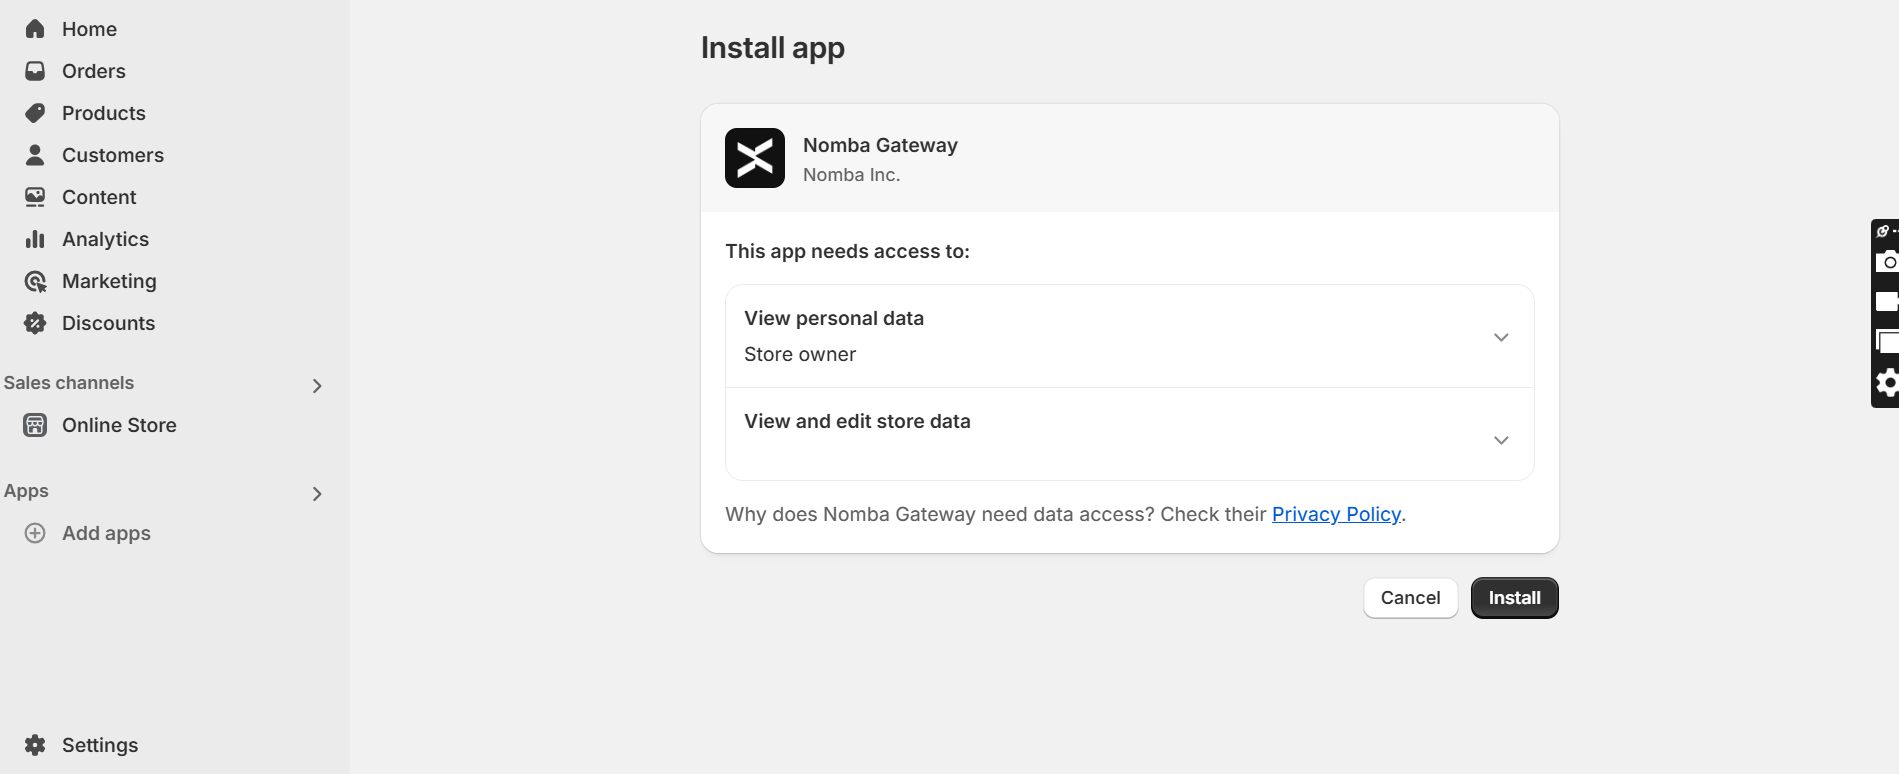 Click on Install to continue.
When you successfully install this app, You will be redirected to Nomba payment gateway config page. On this page, You will add your Client ID, private secret, and account ID.
Click on Install to continue.
When you successfully install this app, You will be redirected to Nomba payment gateway config page. On this page, You will add your Client ID, private secret, and account ID.
You can get test and live keys on your settings page when you have completed setting up your dashboard.
Click on the Ready checkbox, then click the Submit button, and you will get a notification that your data was saved without issue. Click go back to payment settings to activate the Nomba app.
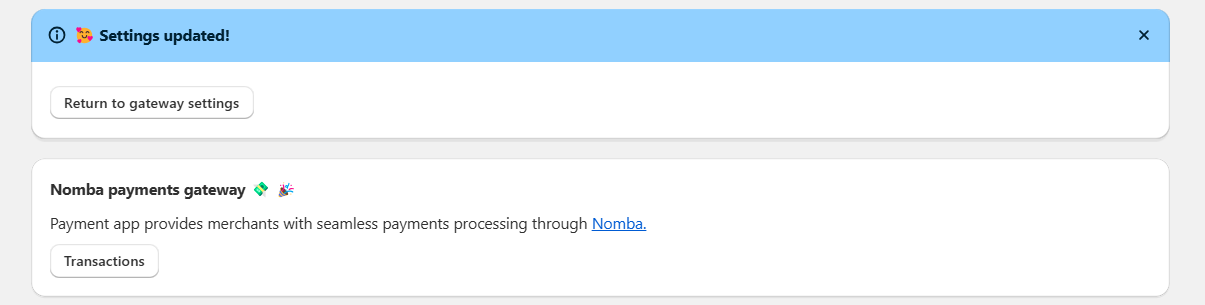 This image shows a notification update, describing the status of the action you just completed.
Click on the arrow left button and you will be redirected to a page where you can now activate Nomba for your Shopify app.
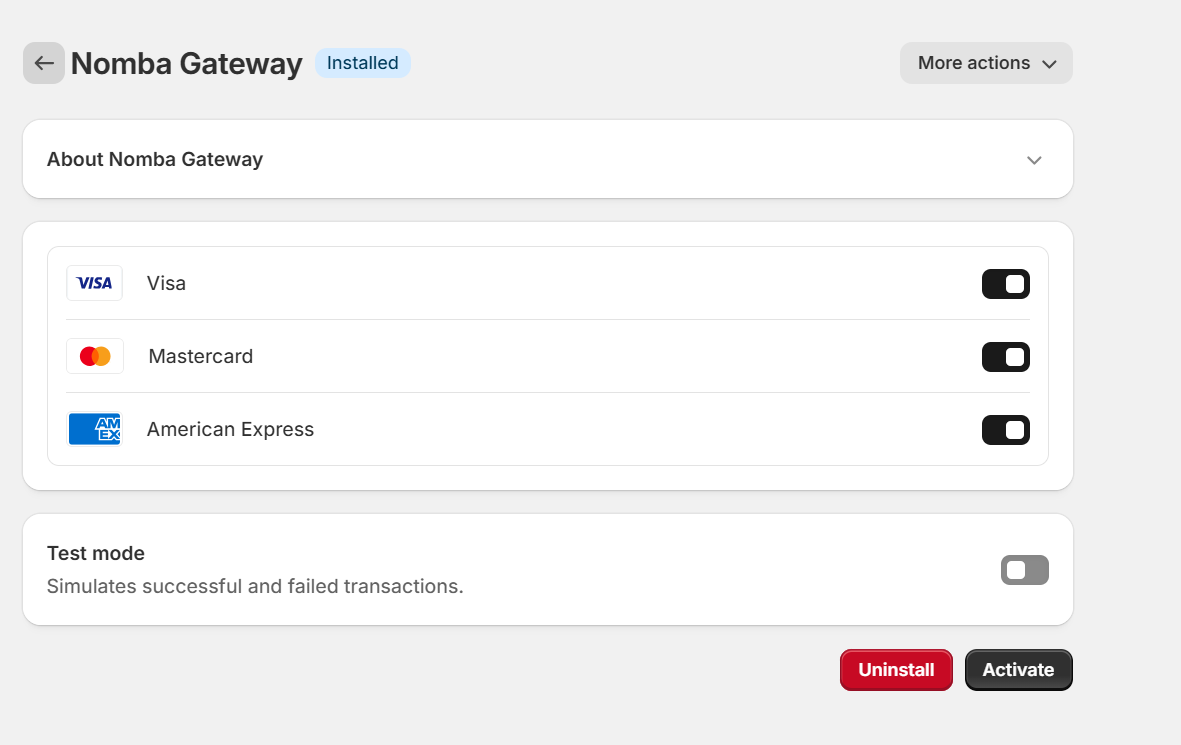
Click on the activate button and you have successfully enabled Nomba as a payment service in your Shopify App. You can also choose to select which card you would love your business to accept but for this tutorial we have all selected.
conclusion
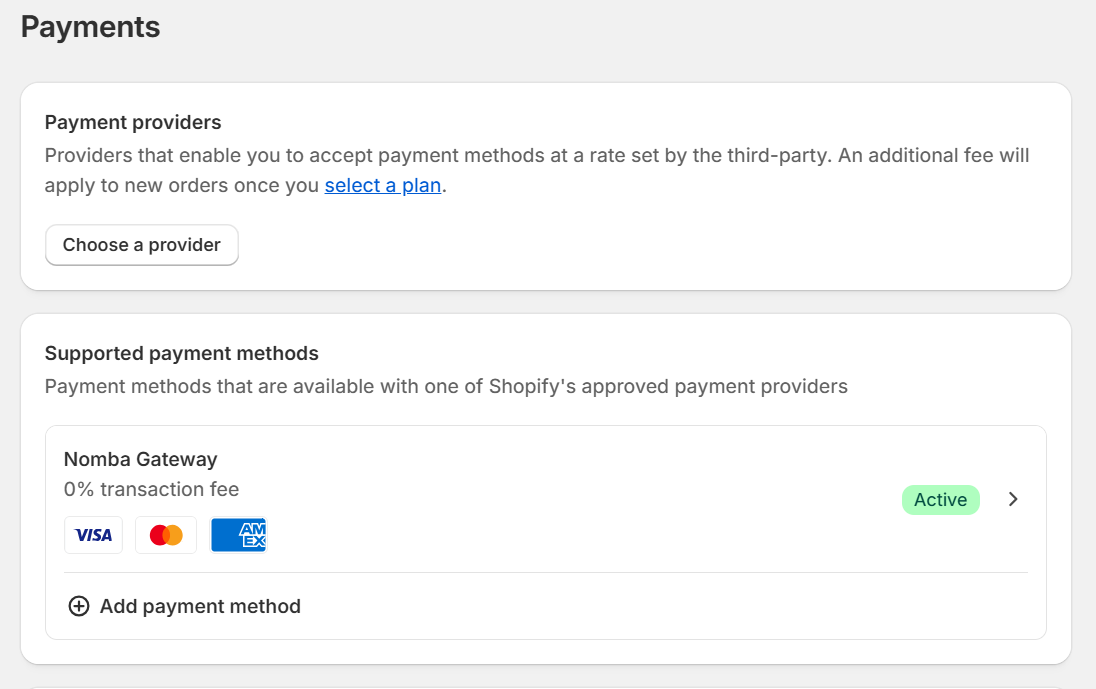
With Nomba, you gain access to a reliable and secure payment solution that enhances your store’s checkout experience. Whether you're running a small business or scaling an enterprise, using Nomba as a payment provider, ensures that your customers enjoy smooth payment processing experience. Now, your business can thrive without thinking of any payment hassle.
